Adding Email to Linux SMTP Gmail WordPress send email
1. Install packages
Run the following command at the prompt to install Postfix along with simple authentication layer security (SASL), which Postfix will use to connect to Gmail.
sudo apt install postfix libsasl2-modules
During the installation, you will be asked about how the mail server should operate. You want an Internet Site, where email is sent and received directly using SMTP, so select that option.
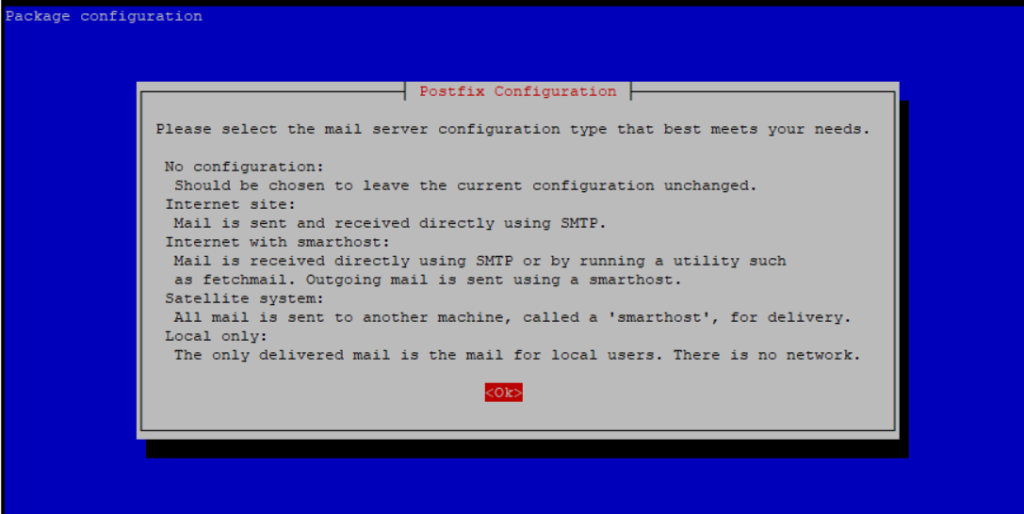
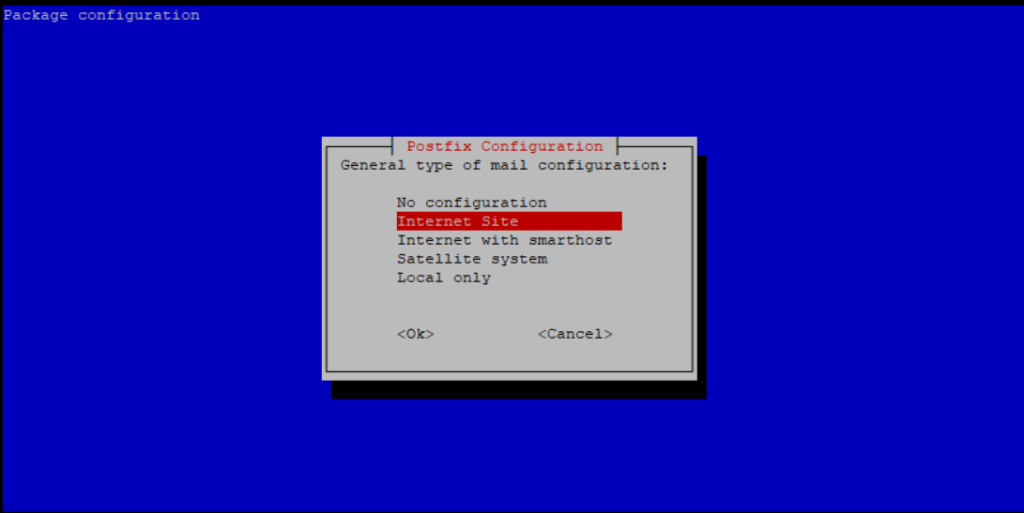
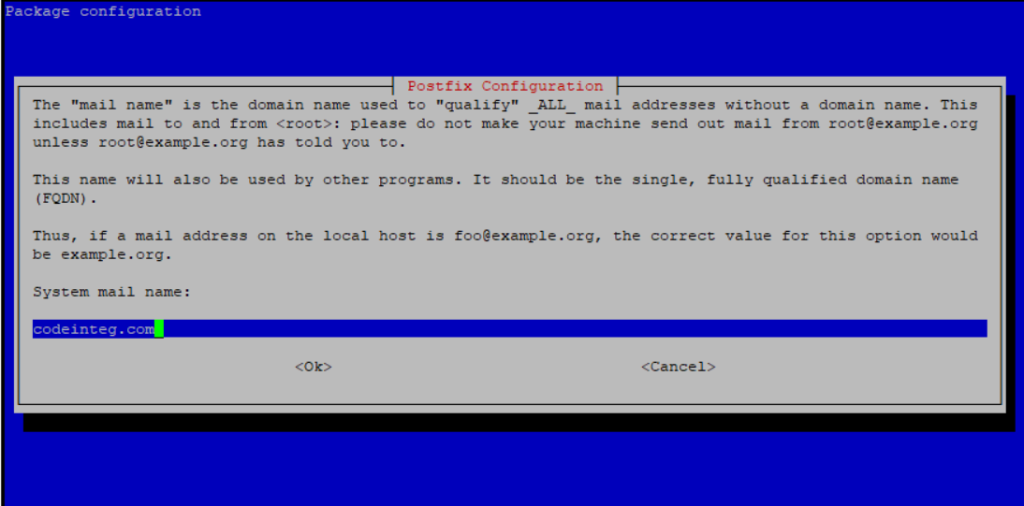
Don’t stress over this, you can modify it later by editing the /etc/postfix/main.cf file if you need to.
2. Get an Application Password for Postfix from Google
I have Google set up for two-factor authentication (2FA), so how will the Pi be able to send an email? Well, it turns out you can get Google to generate an application password, which is a password to allow a specific application to connect.
To get an application password head to: https://myaccount.google.com and log in.
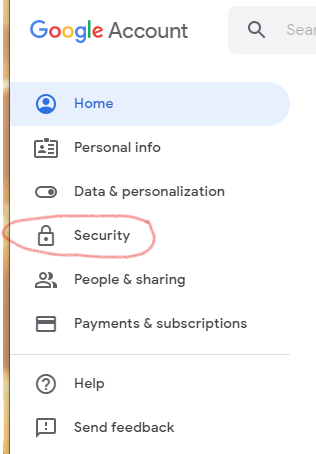
Select “Security” from the list on the left.
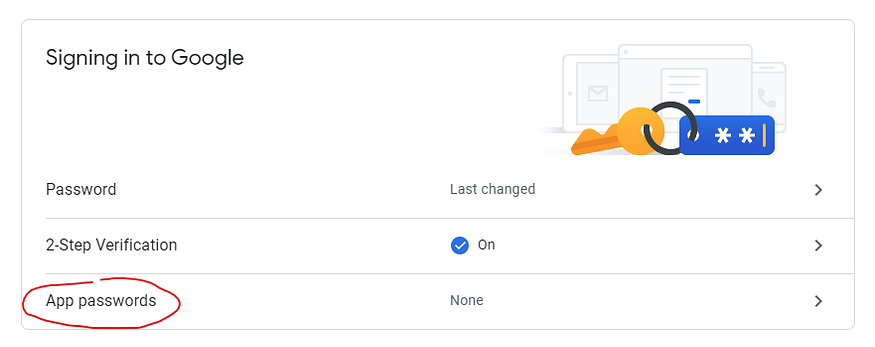
Note that I have two-step verification turned on. You might or might not; either way, creating an application password for each application is a good idea. If you lose a device or it is stolen, you can revoke the application password and not have to change your existing password or passwords for other applications.
There should be a box for “Signing in to Google” that contains an option for “App passwords.” Click on that. You might have to sign in again at this point (I did). This should take you to the page to manage application passwords. The example account I am using doesn’t have any.
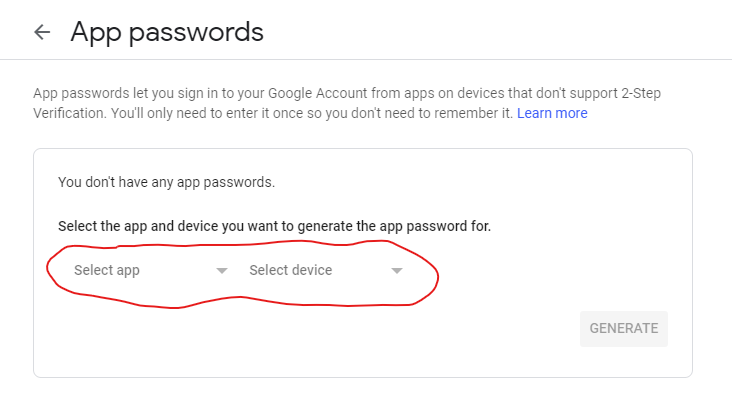
Now click on “Select app” and select Mail. Then click on “Select device” and select Other. You’ll need to enter the name of the device (for this example it is codeinteg.com). Click Generate to create the application password.
You should now be presented with a new application password. This is the text in the yellow block in the image above. Success! Do not click done! Copy the app password first, or write it down. You’ll need it and you can’t display it again.
3. Configure SASL
(A lot of the content of this section is taken from the Postfix SASL HowTo.)
We are almost done. The next thing to do is to add the app password you just generated to the SASL configuration. Run the following command.
sudo vi /etc/postfix/sasl/sasl_passwd
This command will open the file in an editor. It is likely the file does not exist, and you will see an empty file. Add the following line, replacing username and password with your Gmail username and the application password you just generated (don’t include the spaces).
[smtp.gmail.com]:587 username@gmail.com:password
This line tells SASL that when it connects to the host smtp.gmail.com at port 587 to download mail, it should use the given username and password to connect. Exit and save with CTRL+x, y, and Enter.
This file contains a “clear text” password. Run the following command to protect that file.
sudo chmod u=rw,go= /etc/postfix/sasl/sasl_passwd
This command sets the user permissions (root) to read and write and removes any permissions for the group and others. (Fans of the numerical form of chmod will recognize this as 0600.)
Now turn this file into a hash file for Postfix. Run the following command.
sudo postmap /etc/postfix/sasl/sasl_passwd
This command will create a new file named sasl_passwd.db in the same directory. It should already have the permissions set correctly, but just in case, let’s also explicitly set the permissions.
sudo chmod u=rw,go= /etc/postfix/sasl/sasl_passwd.db
4. Configure Postfix
Now let’s finish up the configuration of Postfix. Run the following commands.
sudo cp /etc/postfix/main.cf !#$.backup
sudo vi /etc/postfix/main.cf
Find the line (near the bottom) that starts with relayhost =. Here is where we specify that we want to use Google’s SMTP server as our relay host, and this must match what we put in /etc/postfix/sasl/sasl_passwd. Change the line so it looks as follows.
relayhost = [smtp.gmail.com]:587
Next, add the following to the end of the file. (Documentation for these options and others can be found here.)
# Enable authentication using SASL.
smtp_sasl_auth_enable = yes
# Use transport layer security (TLS) encryption.
smtp_tls_security_level = encrypt
# Do not allow anonymous authentication.
smtp_sasl_security_options = noanonymous
# Specify where to find the login information.
smtp_sasl_password_maps = hash:/etc/postfix/sasl/sasl_passwd
# Where to find the certificate authority (CA) certificates
smtp_tls_CAfile = /etc/ssl/certs/ca-certificates.crt
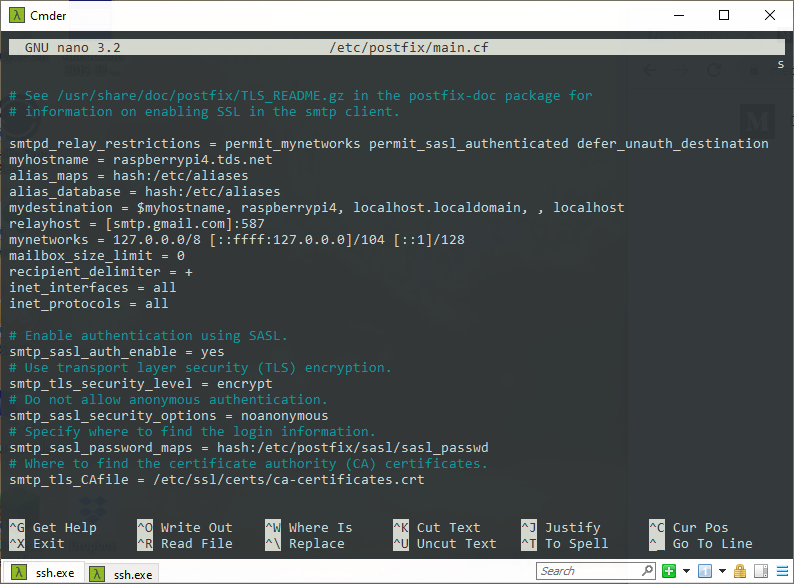
Save and exit with CTRL+x, y, and Enter, and then restart Postfix with the following command.
sudo systemctl restart postfix
Testing Email
Next, let’s verify that we can send an email via Google’s SMTP server. Type the following at the command line, replacing username with your Gmail user name (so the email goes to you).
sendmail username@gmail.com
Subject: It works!
Hey, it works!
.
The first line uses the sendmail command to send an email to the specified recipients (you can list more than one). The subsequent lines optionally specify mail headers like the subject, and then the body of the email. The entire thing is terminated by a period. Note that this is just one way to send email using the sendmail command. Later we will use sendmail to send the output of commands.
Check your email. If you got an email from yourself (remember: Postfix is using your credentials) then everything is working. If you didn’t, then you should check a few places on the system.


